I’m very happy with how I’ve been spending time during the coronavirus lockdown.
Between my dissertation and staying in touch with friends, I’ve managed to accomplish or currently working on most of the things on the to-do list that I wrote at the beginning of quarantine.
I’ve also surprised myself with some other activities. For example, I’ve mastered my amateur oyster shucking skills and wrote about the experience on a new lifestyle blog that I’ve launched with my coworkers.
Another surprise was my interest in picking up a paintbrush.
I had no intention of getting into any craft projects, but I recently tried painting oyster shells. It’s an incredibly easy activity to create something beautiful for your home or for your loved ones as gifts.

Inspiration
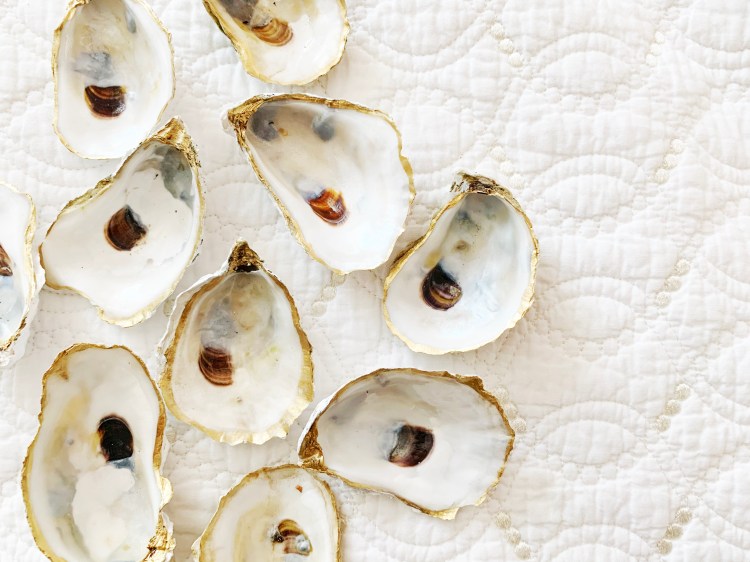
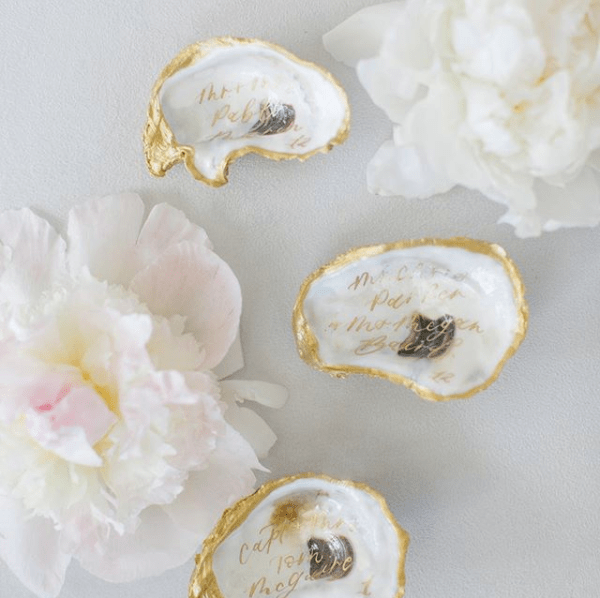
I was recently scrolling through Instagram when I came across these gilded, painted oyster shells. It turns out that painted oyster shells are not only used as ring and trinket dishes—they’re actually common for coastal weddings as name tags or wedding favors.
Many artists have painted very elaborate designs, but I prefer the ones with a more minimal style.
There were my favorite inspiration posts:

How to DIY Painted Oyster Shells
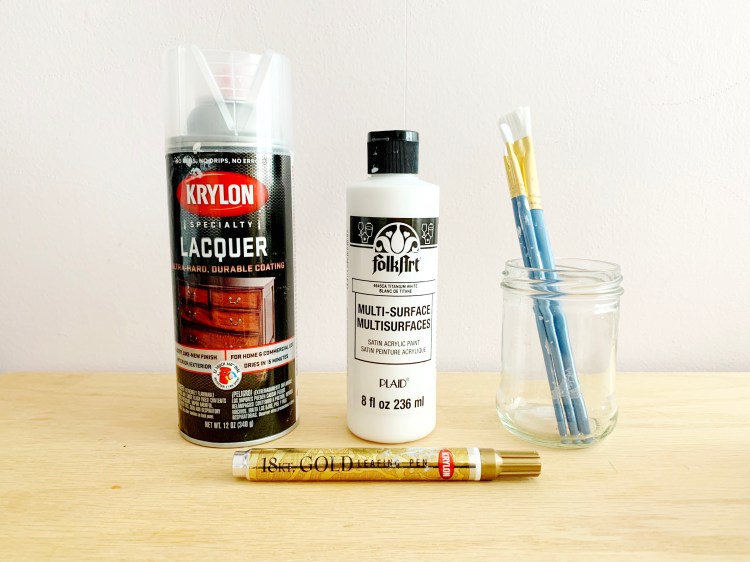
What you’ll need
- Oyster shells
- White multi-surface acrylic paint
- Clear, high gloss lacquer spray
- Paintbrushes- 1 broad stroke, 2 finer detail strokes
- Gold leafing pen
- Palette and palette paper
- Baby wipes (to clean paint off of your hands)
- Rag (to wipe paintbrushes)
Steps
*Note: You’ll need to carve out some time in the day for this project. However, this is great for people who love to multitask because you’ll have the flexibility to get other things done during downtime—cook lunch, switch laundry, call a friend.
- To begin, spray the interior of the oysters with the clear lacquer—be sure to spray outdoors or in a well-ventilated area. Let the lacquer set and dry for 45-60 minutes.
- Repeat Step 1 to spray the exterior of the oysters.
- Using the broad stroke brush, coat the exterior of the oyster shells with white paint. Let dry 30 minutes or until dry to touch.
- Prepare the gold leafing pen and carefully stroke the oyster shell edge. For a more natural gold edging, follow the edge and observe the matte texture border—you’ll see how the matte texture meets the visible natural sheen of the shell’s interior, even with the clear lacquer aside.
- To finish and seal the paint, repeat Step 1 & Step 2.
- Enjoy your nautical-inspired treasures!
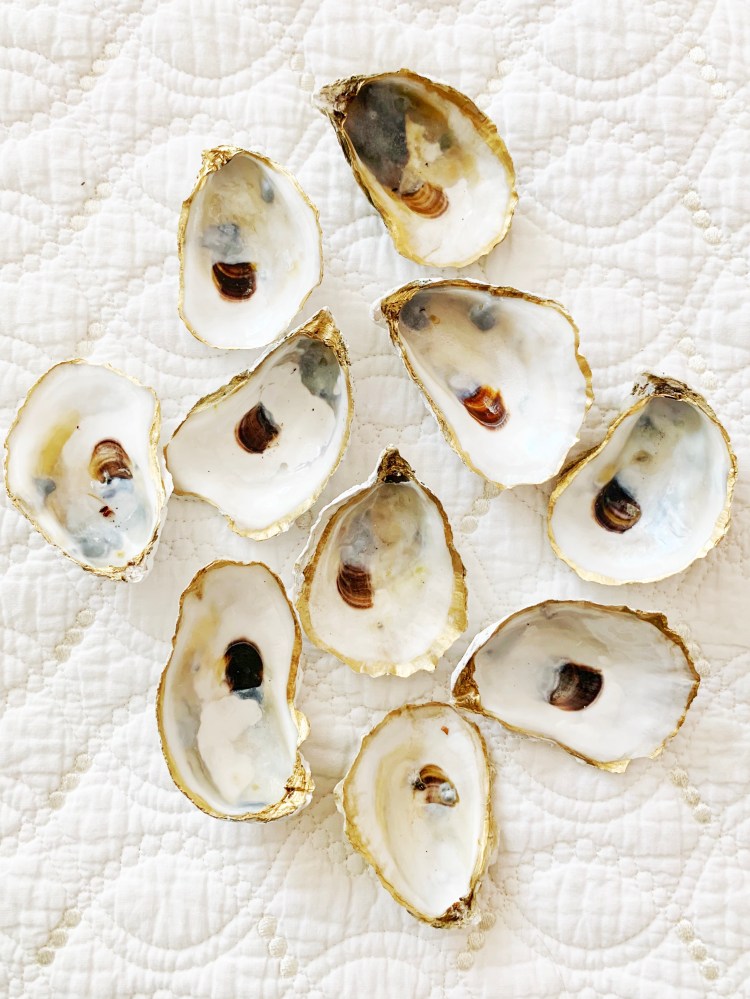
Whether you prefer a more minimal style or looking for a more elaborate craft, this basic oyster shell painting process is a great foundation to build upon. Play with different metallic paints and colors or try larger oyster shell crafts like creating your own gilded oyster wreath!


They are beautiful Mia. I love the gold edges and you can personalize them. GREAT IDEA…
🤗🤗🤗❤❤❤
LikeLike
What type of pen did you use for the lettering?
LikeLike
I use this pen in gold and silver: https://www.michaels.com/krylon-metallic-leafing-pen/D397316S.html?r=g&cm_mmc=PLASearch-_-google-_-MICH_Shopping_US_N_Craft+%26+Hobbies_N_Smart_Dropship_N-_-&Kenshoo_ida=&kpid=go_cmp-13878185462_adg-126402154044_ad-533200843892_pla-1379736874027_dev-c_ext-_prd-D397316S&gclid=Cj0KCQjw3IqSBhCoARIsAMBkTb3nwVwIHys1V0WQ_wXUErwyxH5BZh0YQCo1I2q0uQb849vI6SzsNEcaAkAcEALw_wcB
LikeLike
did you print out the verse if so what kind of paper did you use
LikeLike
Love this article. I am going to try doing this. Is it possible to use decals inside the shells? If I can, should I apply lacquer before or after I stick the decals on the inside of the shells
LikeLike
Thank you! Search « découpage oyster shells » on Pinterest or Google and you will find artists who apply decals inside the shells. I hope this helps!
LikeLike
Thanks for sharing! How did you clean the shells before painting?
LikeLike
I clean them by rinsing in *hot* water and scraping the remaining oyster bits with a shucking knife. Hope this helps!
LikeLike
I scraped mine soaked in hot waster still had a smell then tried vinegar still a smell. I just soaked in bleach and water
LikeLike